Checkout 2.0
What needs to be prepared?
- Sign Agreement with Avarda. Contact sales@avarda.com if you want to know more or get help.
- Avarda creates user credentials for API:s and configure payment methods and options.
- Merchant installs E-com module or integrates towards Avarda checkout.
- Test, Launch and Go live.
Avarda checkout process overview
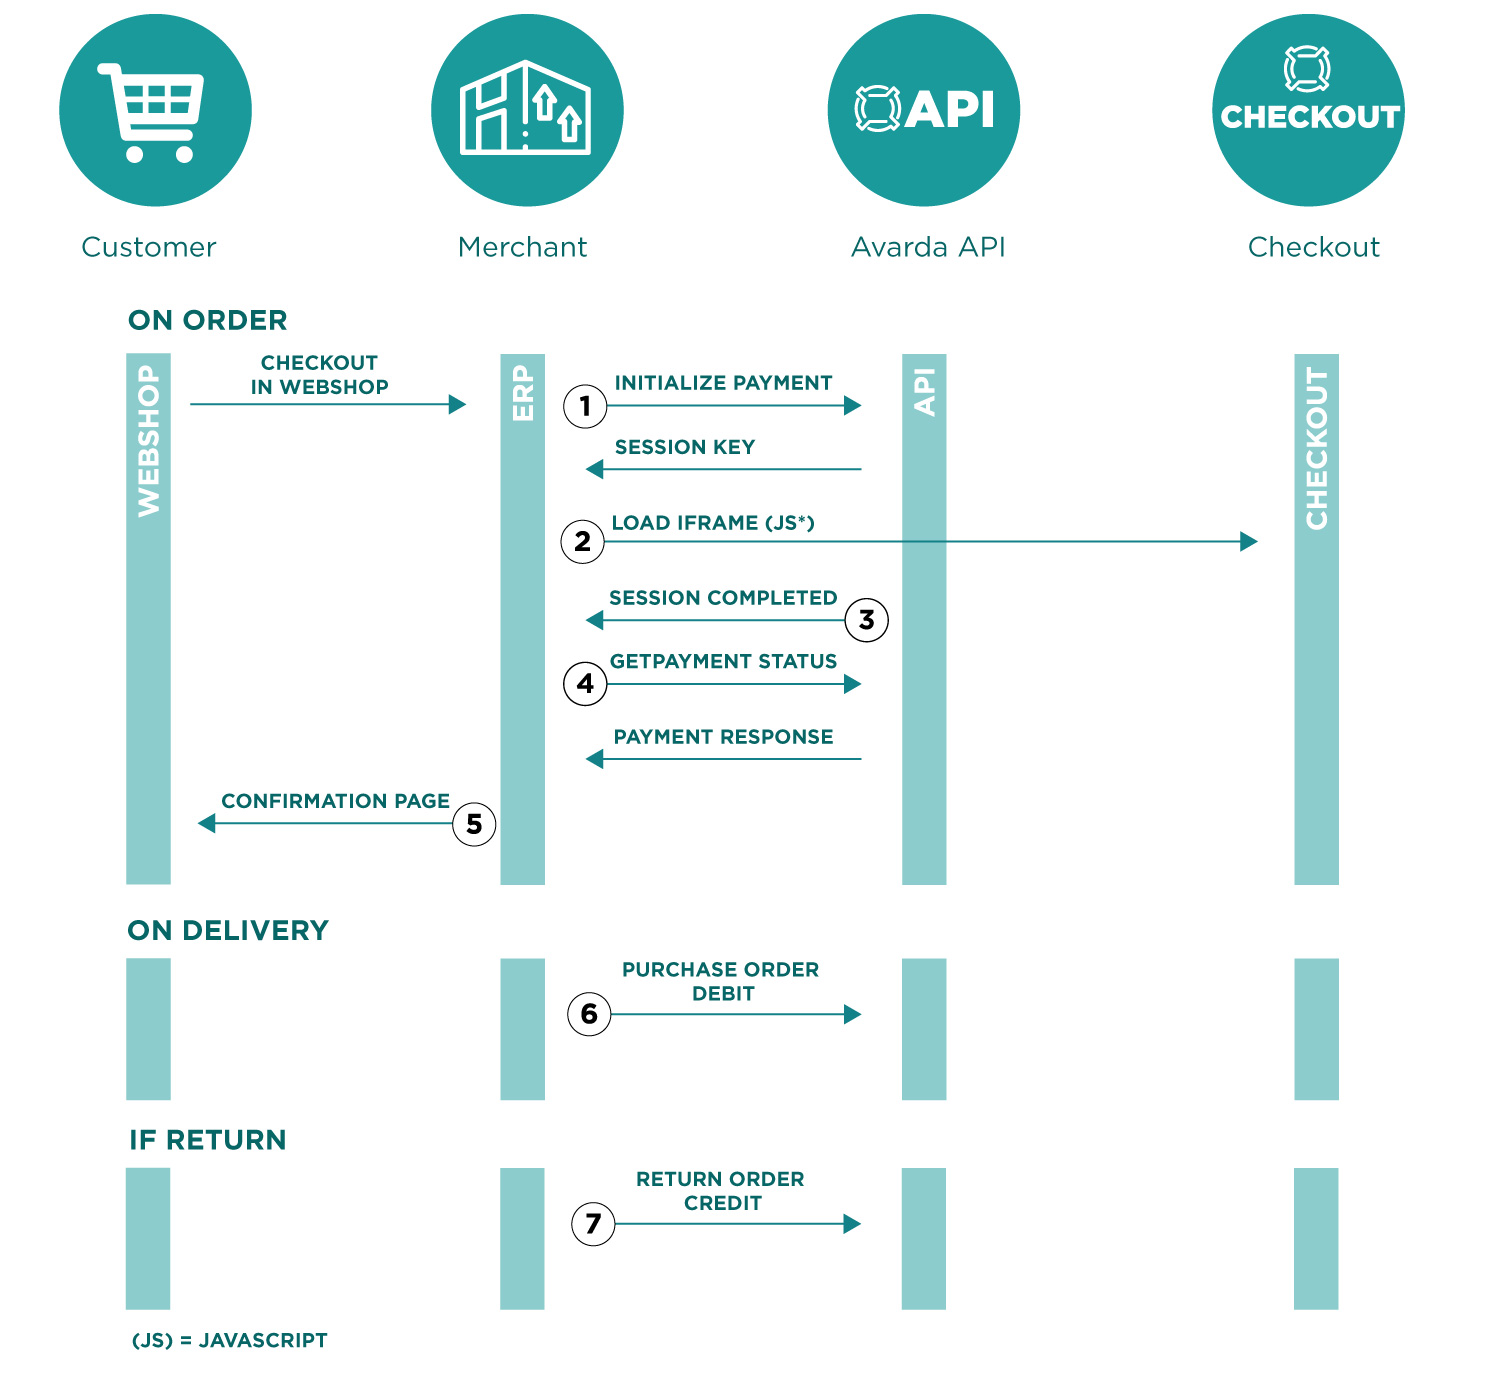
- Initialize payment – Authorize and start payment session via backend API call. Retreive payment session key back.
- Load iframe with received payment key via embedded javascript. Avarda checkout is loaded – customer can walk through the payment dialogs.
- When payment session is completed Avarda notifies the webshop via a javascript event – Done. Additional callback also possible.
- Merchant verify payment status via a backend API call to GetPaymentStatus.
- If successful – load confirmation and “thank you for your order” page.
- When goods are delivered – send PurchaseOrder to charge the customer for delivered goods. Avarda will pay merchant for delivered orders on this message.
- If return are required – send ReturnOrder and credit the customer for returned goods, card payments is refunded to card, direct bank or swish refunded to bank account.
DEMO Shop
https://avdonl-t-monolith.westeurope.cloudapp.azure.com/DemoShopS (opens in a new tab)